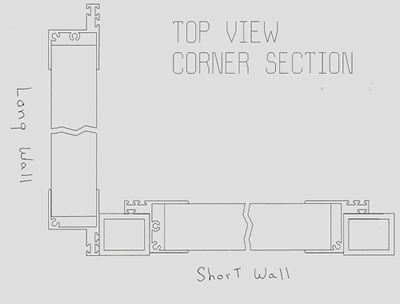
To ensure the correct placement of door openings and corners, cut the bottom track tube lengths at least 12″ shorter than the location of a door opening or corner. Now insert all the panels you can up to that cut. Measure from the edge of the last panel you installed to the cut end of the bottom track tube. Add 5/8” to the next panel width that you are going to install. Cut a piece of bottom track tube to that size and install it. Then insert the next panel and stud. This should insure that the end of your panels will coincide with the end of your tracks.
Installing the panels from the floor to a suspended ceiling
Cut 1/2” plywood to the same size as the ceiling panels. Place them on top of the ceiling panels running in direction of the track.
Installing a top track
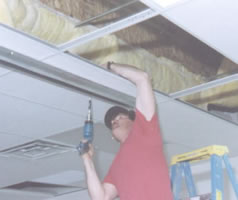
Drill and countersink clearance holes through the top track that will best suit your ceiling pattern. Try not to exceed a distance of 24” between these holes. Do not drill into the ceiling grids of a suspended ceiling in case you remove the divider in the future.
Maintain a straight installation of the top tracks by snapping a line on the ceiling or by measuring over from a straight ceiling grid.
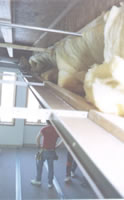
Lift the top tracks into place and secure with appropriate flat head fasteners (not included). In a permanent ceiling, find secure anchoring or use appropriate fasteners to insure a stable wall. In a suspended ceiling make sure the flat head wood screws (not included) are long enough to penetrate through the top track, through the ceiling panel and the plywood.
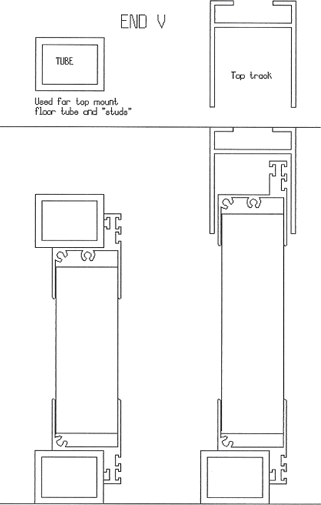
Installing a floor track tube
In ceiling mounts, plumb down from the top track on each end of the wall and make a mark on the floor. Snap a line across the floor using these marks as your guide insuring that the bottom track tube will be located exactly below the top tracks.
Fasten your floor track tube to the floor with the appropriate flat head fasteners (not included) that best suit your flooring material.
For installations that must be removed frequently, you can install “locator pins” that extend below your bottom track tubes. These pins will fit into holes that you drilled into the floor. You can also request a Velcro type material that will fasten unto carpet.
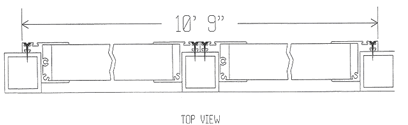
 Installing panels
After the floor tube and applicable top support is installed, begin mounting the panels by placing them on top of the floor track. When installing the panels, it is important they are all checked to make sure they are straight and plumb. Place the vertical “stud” tubes between each panel. If the installation is less than the ceiling height, install the first two panels and then begin fastening the top horizontal tube to these panels.
Panels will be fastened with a #6 screw to the floor tubes, vertical “stud” tubes and when applicable the top horizontal tubes.
Door installation
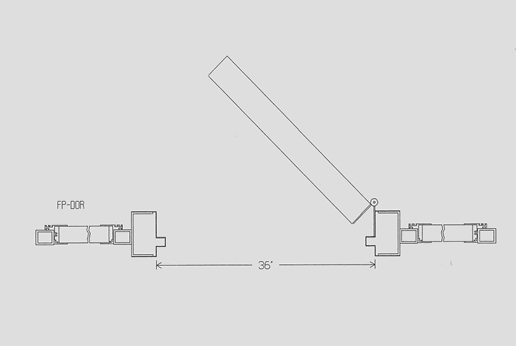
Install the floor track tubes, panels and studs up to the door location. Continue installing the floor tube, one stud and one panel on the opposite side of the door opening. Insert the door header between the studs and fasten it in place making sure that the top is the same height as you other panels. Attach the header tube to the bottom of the header panel with the #6 screws. Fasten the 3” channels to the tubes around the rough opening with #6 screws as shown in the drawing. Install the frame and door according to the supplied instructions.
Finish Inspection
Check all work for proper installation making sure the panels protrude into the top track sufficiently. Panels may be cleaned with mild detergent and water.
Please contact us for a specific quote and additional sizes for your modular wall system.